Jenkins Setup Azure intergration
This guide will help you in setting up a Jenkins and Azure DevOps in order to to run useMango™ tests in Jenkins and view them in Azure DevOps.
Prerequisites:
A Jenkins pipeline job that runs a UseMango™ test should already be setup. A guide can be found here
To setup Azure you will need to have pipeline creation permission
Creating Jenkins service connection
Let’s start by creating the Jenkins ApiKey credentials that the Azure Pipeline script will need to retrieve Jenkins jobs from your account:
-
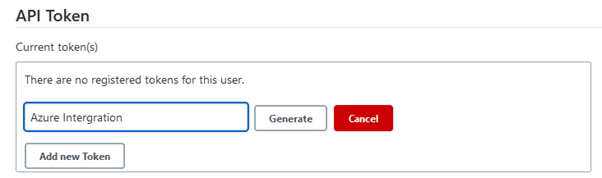
On the Jenkins home page, in the top right corner of the page, click user account icon. Open the Configure tab in the left panel and scroll down until you reach the Generate API token section. Click on the Generate option and enter Azure Intergration as the Api token name then click generate.
-
Save the api token for for later use
-
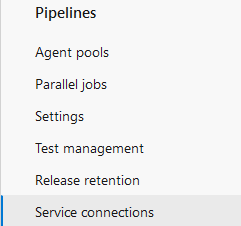
Login to Azure DevOps and click the settings icon on the bottom of the left panel. Navigate to the Service connections option.
-
Click New service connection on the top left.
-
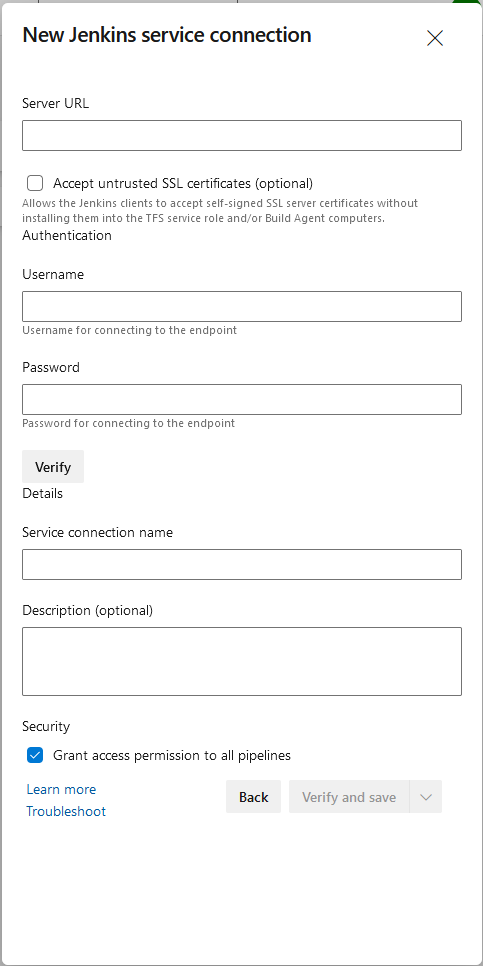
Select the Jenkins service type.
-
Fill out the Server URL, Username and Password fields with the correct credentials, note that the api token generated before should be used as the password.
-
Fill out the remaning fields.
Altering your Jenkins pipeline Job
Now, to edit the Jenkins pipeline,
Note that script line numbers mentioned below are approximate as the base script may change.
-
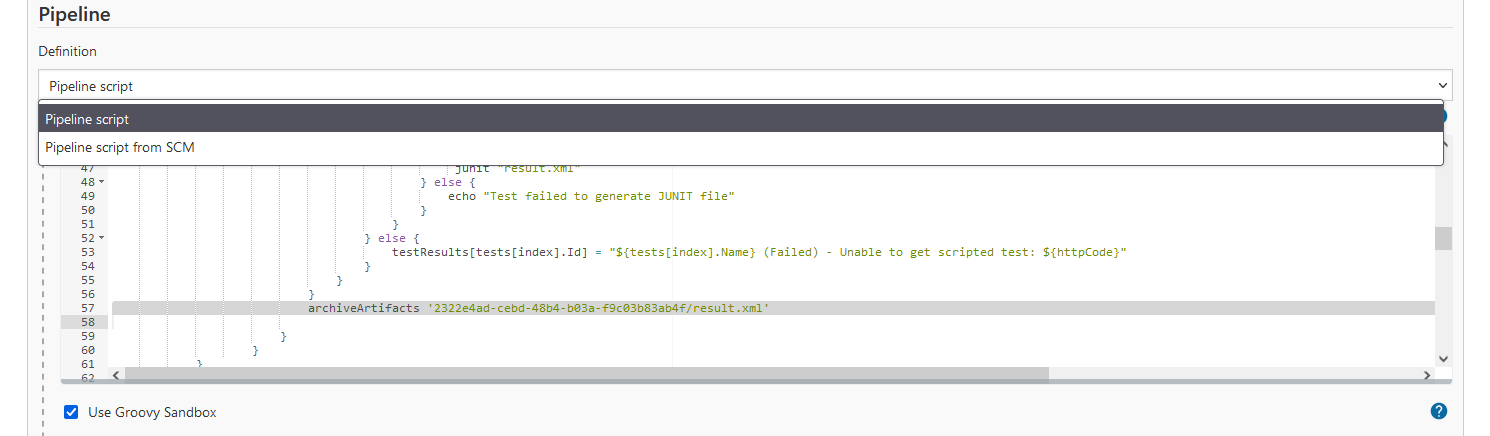
Switch the Pipeline script from SCM option to the Pipeline script option.
-
Next, we need to copy the script from the github repository here and paste it into the newly created text field. The script is in a file named Jenkinsfile.
-
The Jenkins script contains URLs that need to be edited in order to select the correct branch and environment for the usemango tests. Replace the line 14, 15, 16 with the correct URLs.

-
The Jenkins script also required the node value to be changed in order to run the job on the correct jenkins node. This can be done by entering the node tags into the field shown below in the code.

-
Finally, the code below should be added to the 57th line of the script.TEST-ID should be replaced with the ID of the relevant test.
archiveArtifacts 'TEST-ID/result.xml'
Creating Azure DevOps release pipeline
Now, to create the Azure DevOps release pipeline that will run our Jenkins job and retrive the artifacts,
-
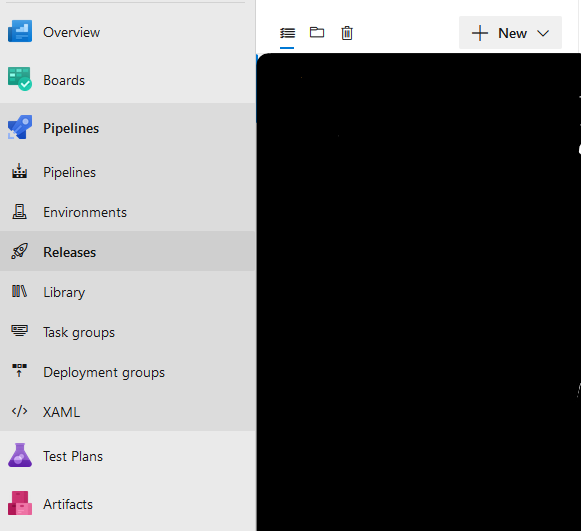
Firstly, create a empty azure release pipeline, this can be done by clicking the Pipeline button on the left panel of the Azure DevOps home screen then selecting releases and clicking on the + New dropdown shown below.
-
Select Empty job and then click on the click on the centre of the stage 1 box to open the tasks. The Agent job should have the agent pool set to Azure pipelines and Agent Specification set to windows latest.

-
Next, add a click the + icon on the right of the Agent job to add a new task. Then add a “Jenkins Queue Job task” and configure it to run a specified UseMango test by entering the Jenkins pipeline job name in the field provided and selecting the service connection created earlier.

-
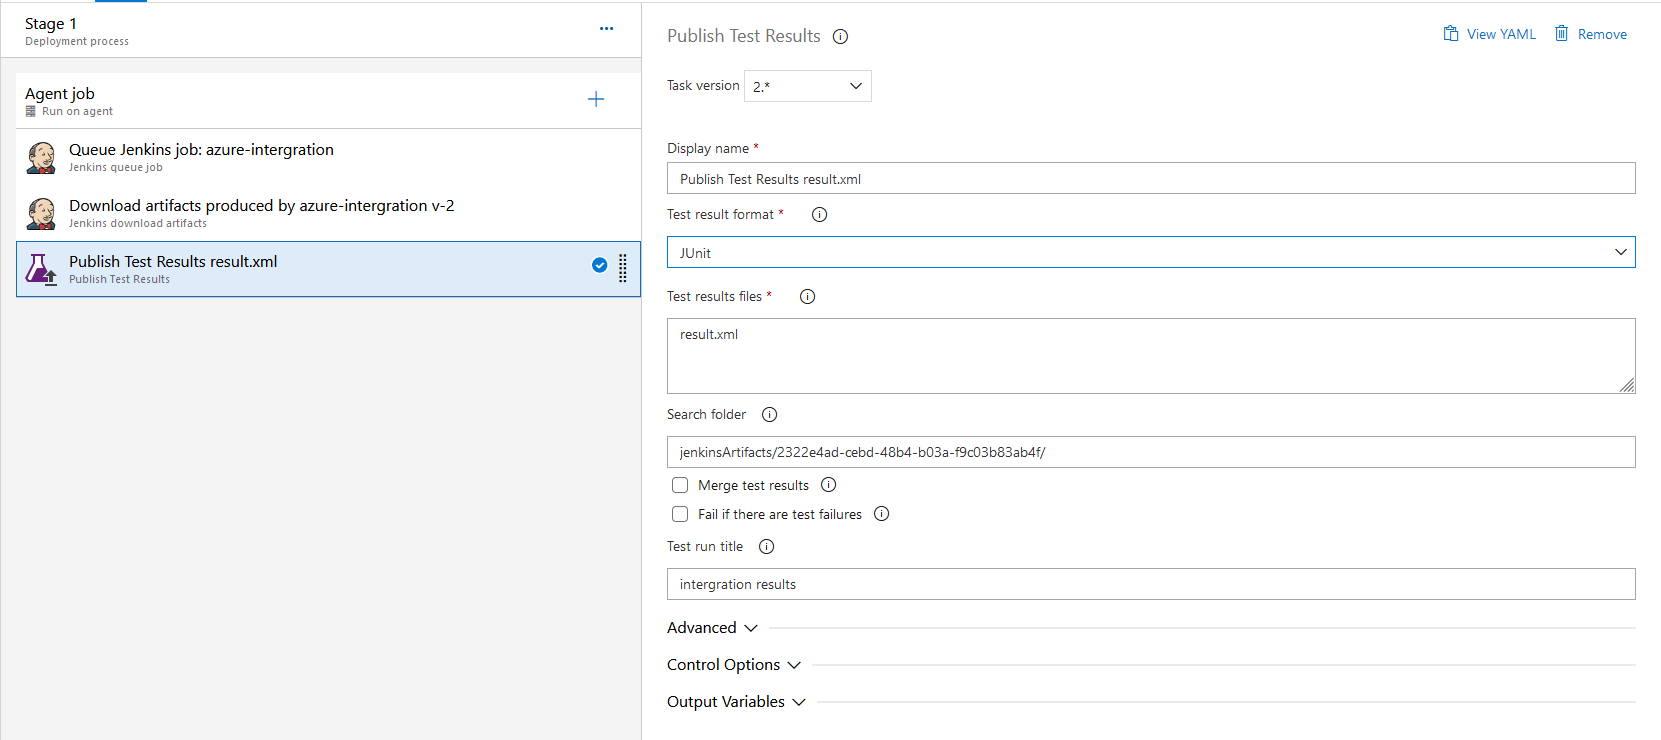
Add a Jenkins download artifact task and configure it to download the artifacts from the job queued in the previous task by specifying the Jenkins job to download the from artifact and what folder to save it to. Save it to any folder name but it will be used in the next step.

-
Finally, add a Publish Test Results task and enter the folder chosen in the previous task concatenated with /TEST-ID replacing TEST-ID with the id of the UseMango test the Jenkins job is running. You should also add “result.xml” to the test result file field.
-
The pipeline is now ready to be released and deployed.