Create your first web test
This topic describes how to get started with testing web applications.
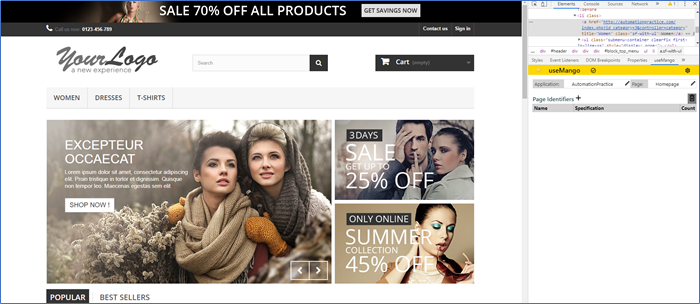
In this test, a purpose-built demo eCommerce website http://automationpractice.com/index.php.
Constructing your first test
-
Create a new test in useMango™ (see Create a new test in useMango ).
-
Change the name of the test to “Demo test” by clicking on the test name field.
-
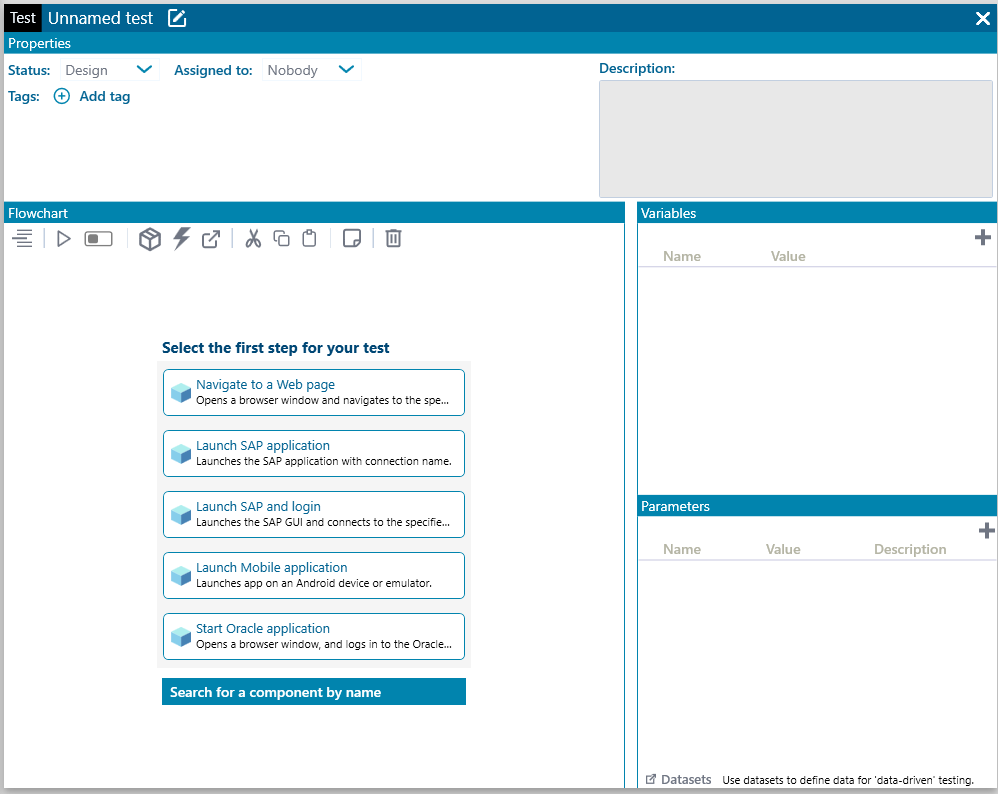
In the Sequence panel of the page, click on “Navigate to a Web page” component as first step (see Add steps to a test )
-
Create a test variable to store the url of the page (see Create test data variable). Change the name of the test variable to “url” and then specify the url of the page to navigate to, in this case “http://automationpractice.com/index.php”.
-
Add the test variable as start url parameter to the step LaunchWebBrowser (see Add data variable to test step ). The default Browser name parameter value is chrome.

-
Run the step to ensure the URL works (see Run a test).
useMango™ comes with a large number of standard components which allows you to automate most of the range of supported applications. Using chrome extension will help us identify the identifiers in the page without the need to manually find ways to identify them.Running each step after adding them ensures they work and naturally moves the test of the application to the next stage in the test. This is also an efficient way to detect and fix errors, one step at a time. If the test step doesn’t succeed, press the small log icon on the step to inspect the run log and fix any issues.
-
Configure the chrome extension to the current server and project (see Configuring the extension ).
-
Once the configuration is complete, it should look like this.
-
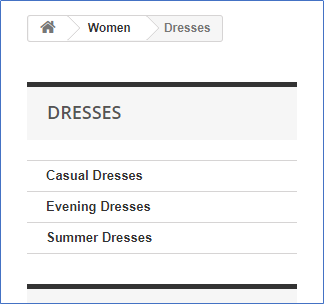
Next step is to click on the DRESSES link on the page and this can be done using chrome extension.
-
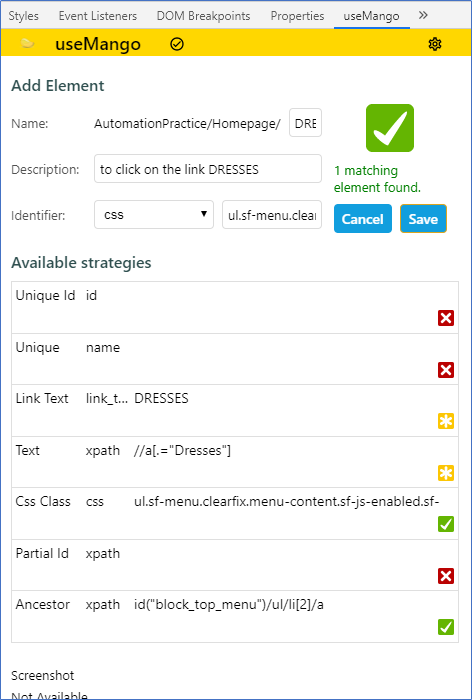
Open the DevTools and use the Inspect element tool to click on the link ‘DRESSES’. Now click on the ‘+’ icon in the useMango chrome extension panel in the DevTools.
-
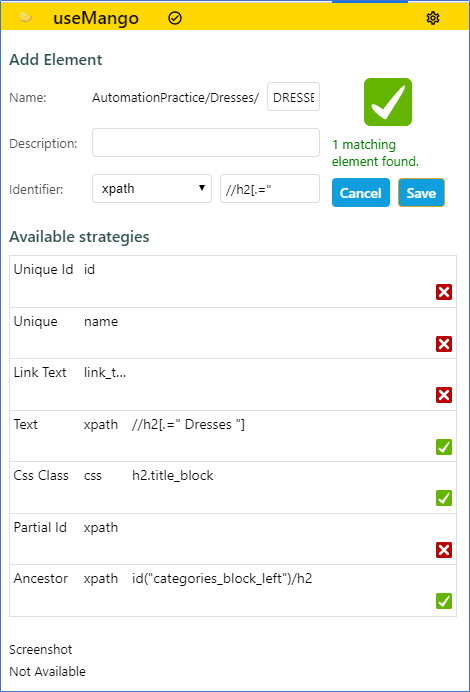
All the strategies available for the link ‘DRESSES’ will be displayed. Select the strategy to identify by css. Enter a Description for the element if you wish and click Save.
-
Navigate back to Test Designer and click on Insert step and add Web-Click component as the next step.
-
In the identifier field of Web-Click component, enter the keyword dresses and a list of values matching the keyword would be displayed. Select the identifier DRESSESlink (AutomationPractice/HomePage) and click enter.

-
Run the step to ensure that the link is clicked successfully.
-
Now we will verify that the result is what we expect. The Web-Click step has now brought us to a page in which we will verify that something exists. In the next step, we will verify if the title of the page matches ‘DRESSES’.
-
Add a new page in the chrome extension called Dresses.
-
Select the ‘Dresses’ title on the left side of the page and add the identifier in the chrome extension.
-
Select the strategy Text and click save to add it.
-
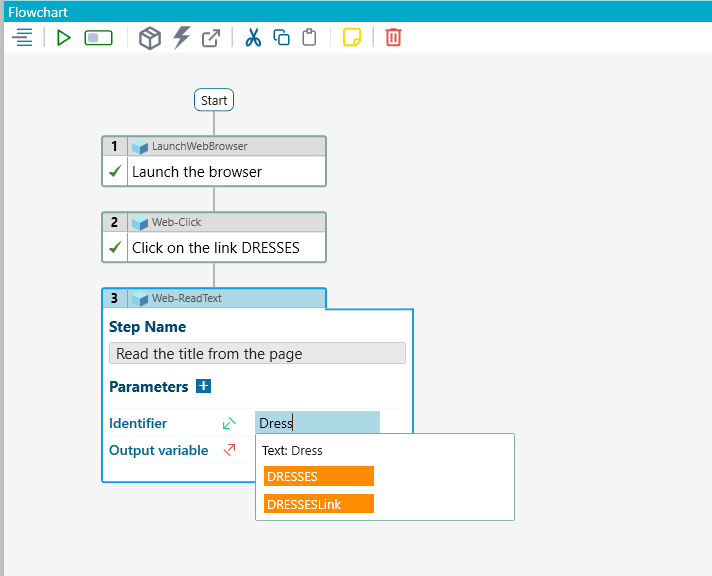
Navigate back to Test Designer and click on Insert step and add Web-ReadText component as the next step.
-
In the identifier field of Web-ReadText component, enter the keyword dresses and a list of values matching the keyword will be displayed. Select the identifier DRESSES (AutomationPractice/Dresses) and click enter.
-
Now create a new test data variable ‘readOutput’ and assign it as Output Variable to the component Web-ReadText.
-
Run to ensure that the test data variable was populated with the value.
-
To make sure the value read from the page is as expected, let’s add a verification step at the end.
-
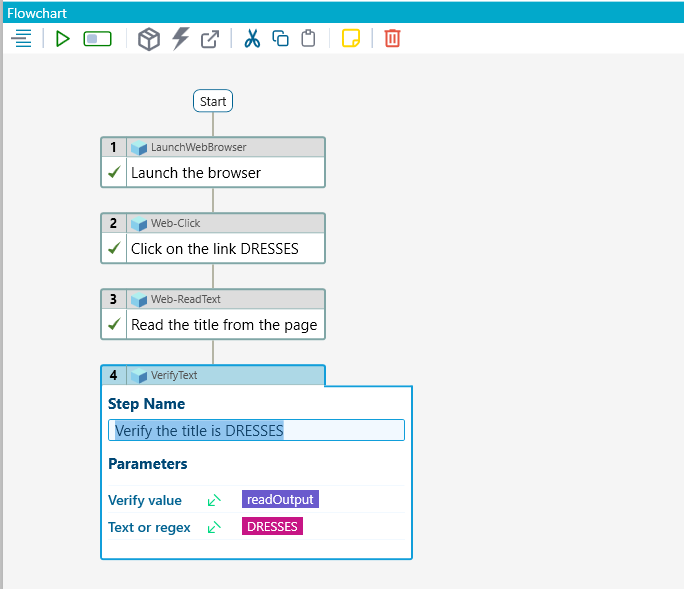
Click on Insert step and add VerifyText as next step.
-
Drag and drop the test data variable readOutput to the verify value parameter in the component. Enter the text ‘DRESSES’ into the textfield for the parameter Text or regex and select the option Text: DRESSES from the drop-down displaying the list values available.
-
Run the step to ensure the step works.
-
Always clean up after the test has finished by closing the web browser by using a CloseBrowser component (any applications using a login should also log out prior to closing the browser). Run the new step to close the browser.
-
When a test has been written always ensure it can be executed from start to finish. Do this by selecting the first step in the test and then the last step while pressing SHIFT key. Click on the play button at the top of the sequence panel to run all the steps, ensuring it works as a whole.
-
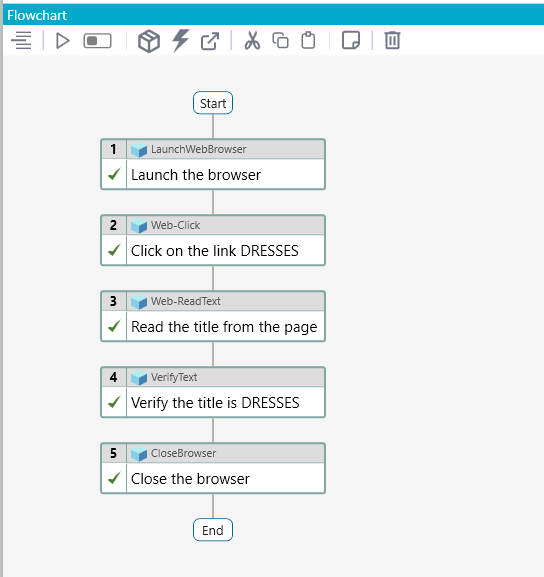
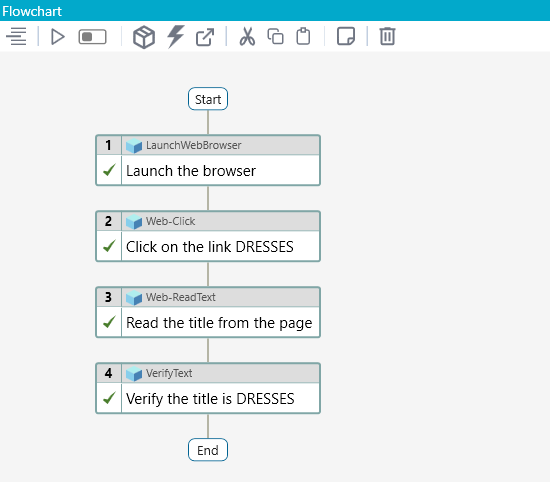
Your finished test should look like this.