useMango™ Documentation > Working with useMango™ > Integration with Jenkins > Set up Windows node in Jenkins
Set up Windows node in Jenkins
1. Create new Node
This method is only applicable for setting up a node locally and might differ elsewhere.
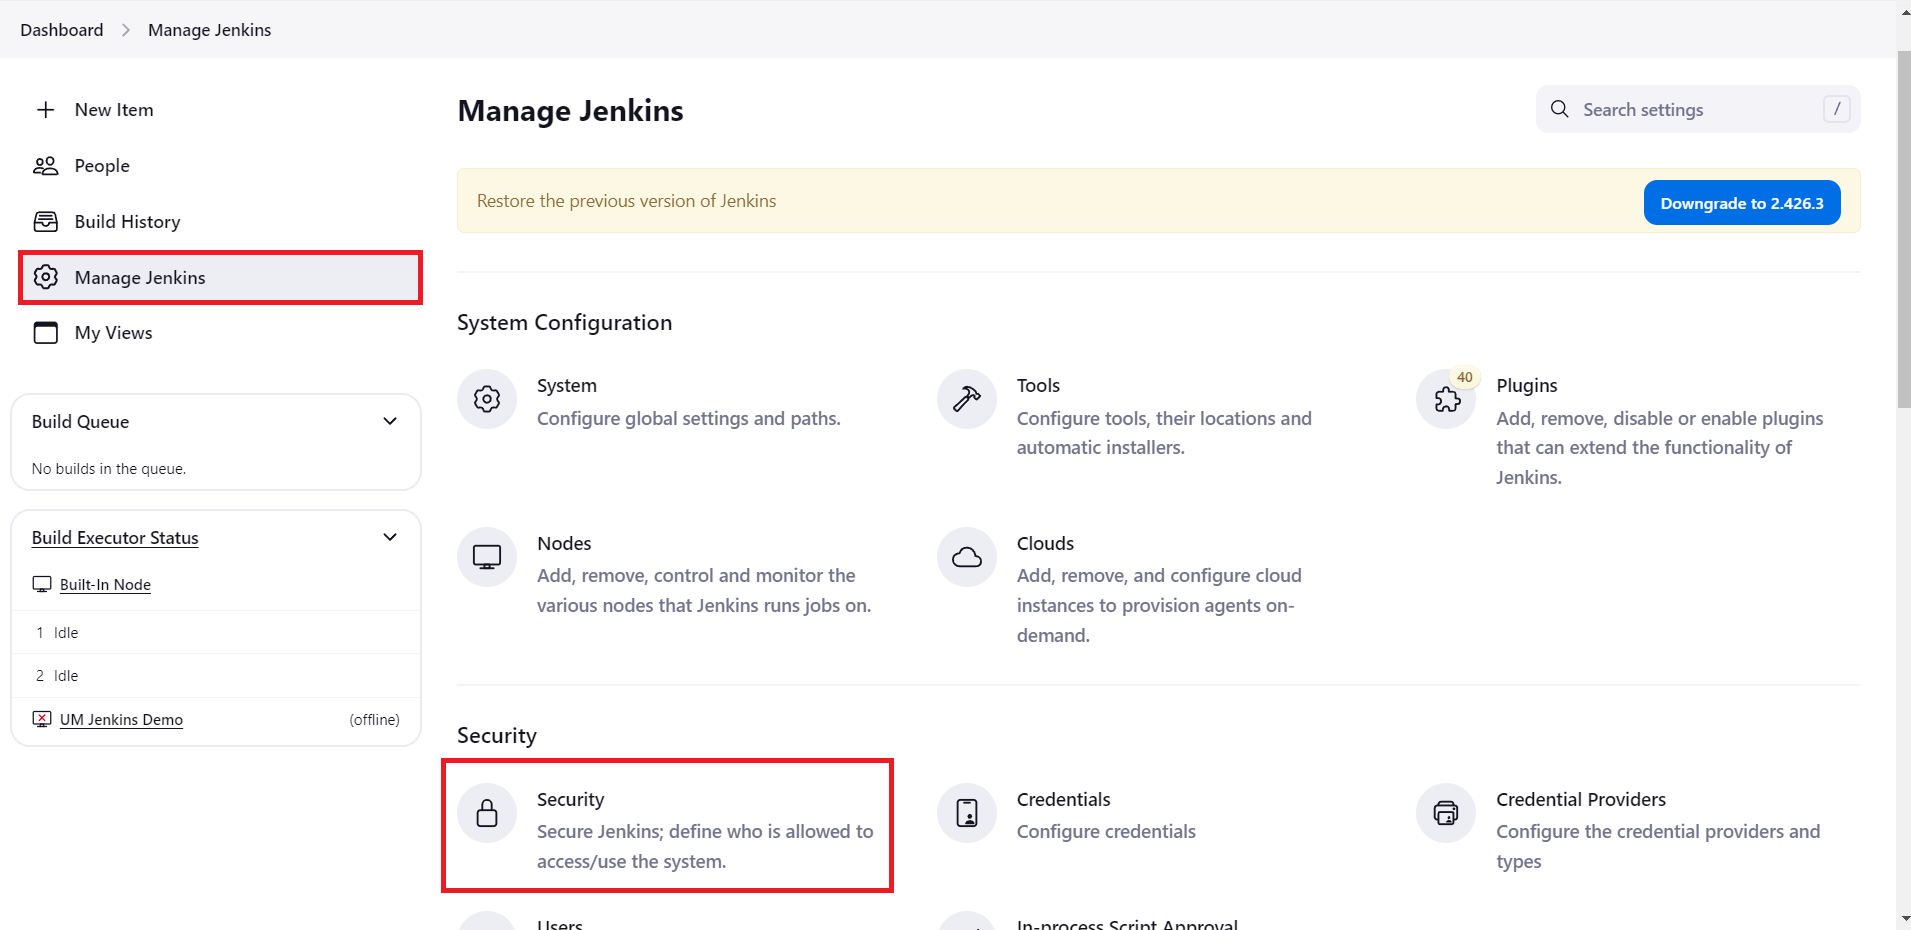
- Login to your Jenkins and go to dashboard
- Click on Manage Jenkins and then click on Nodes.
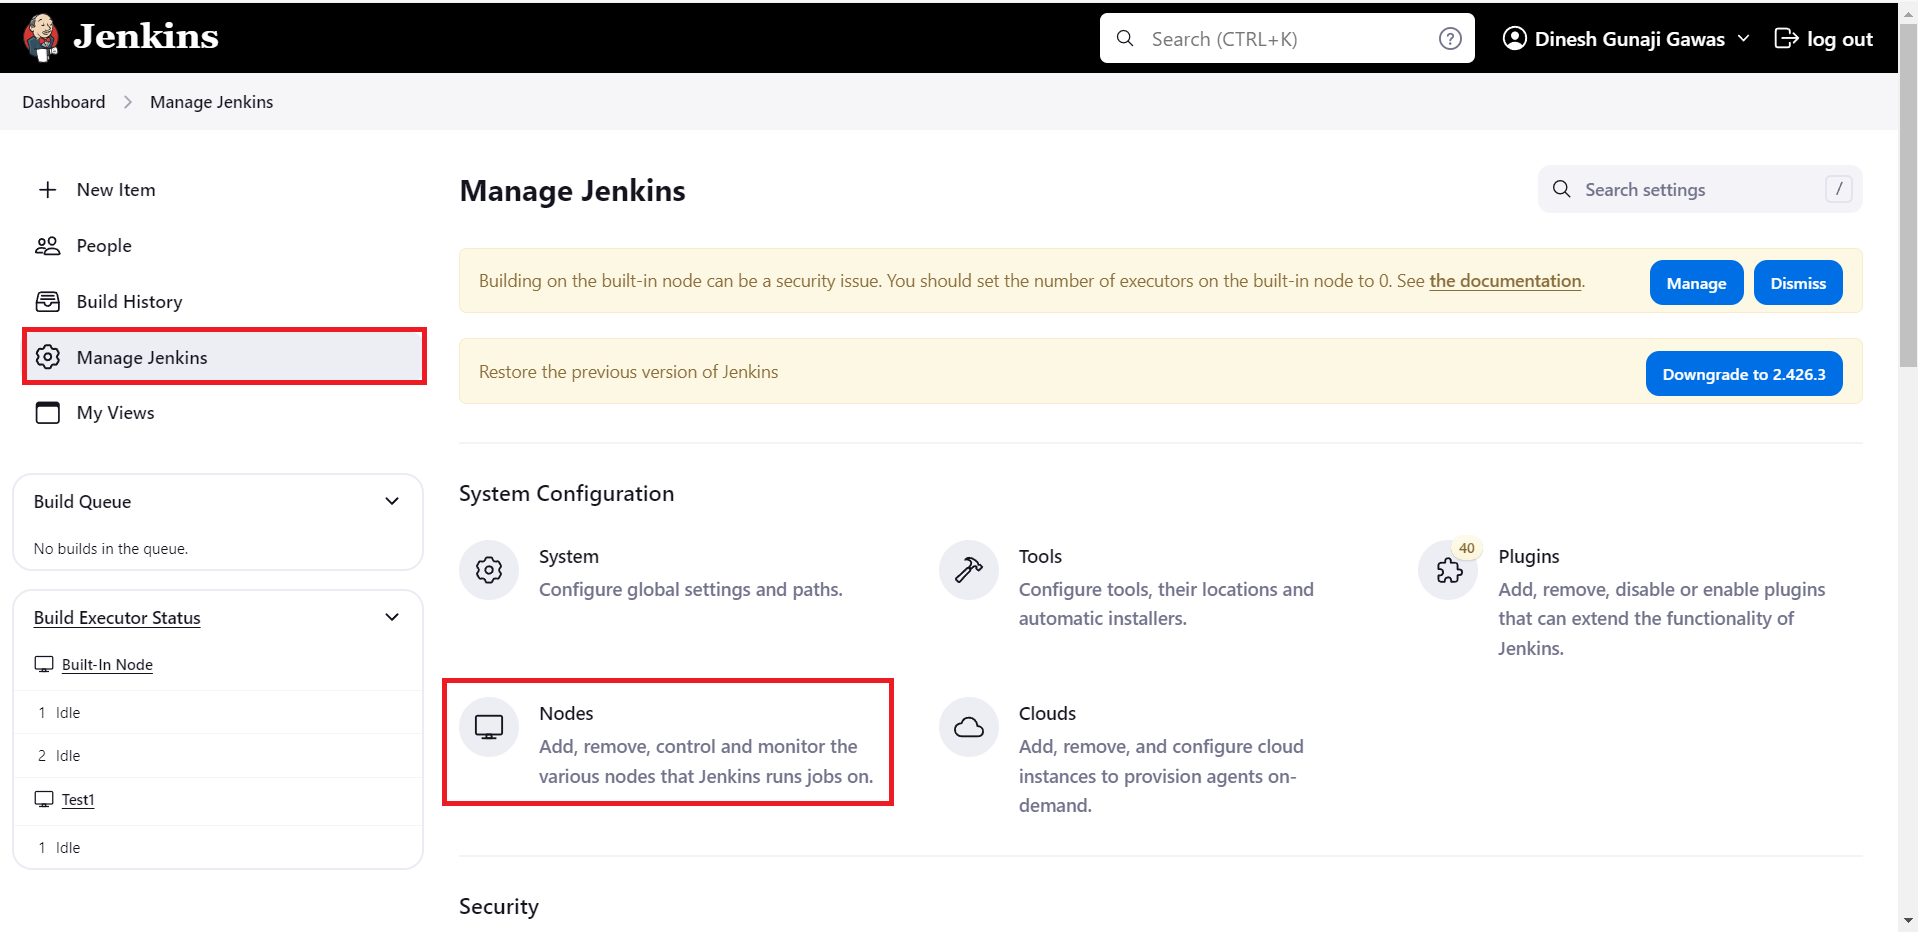
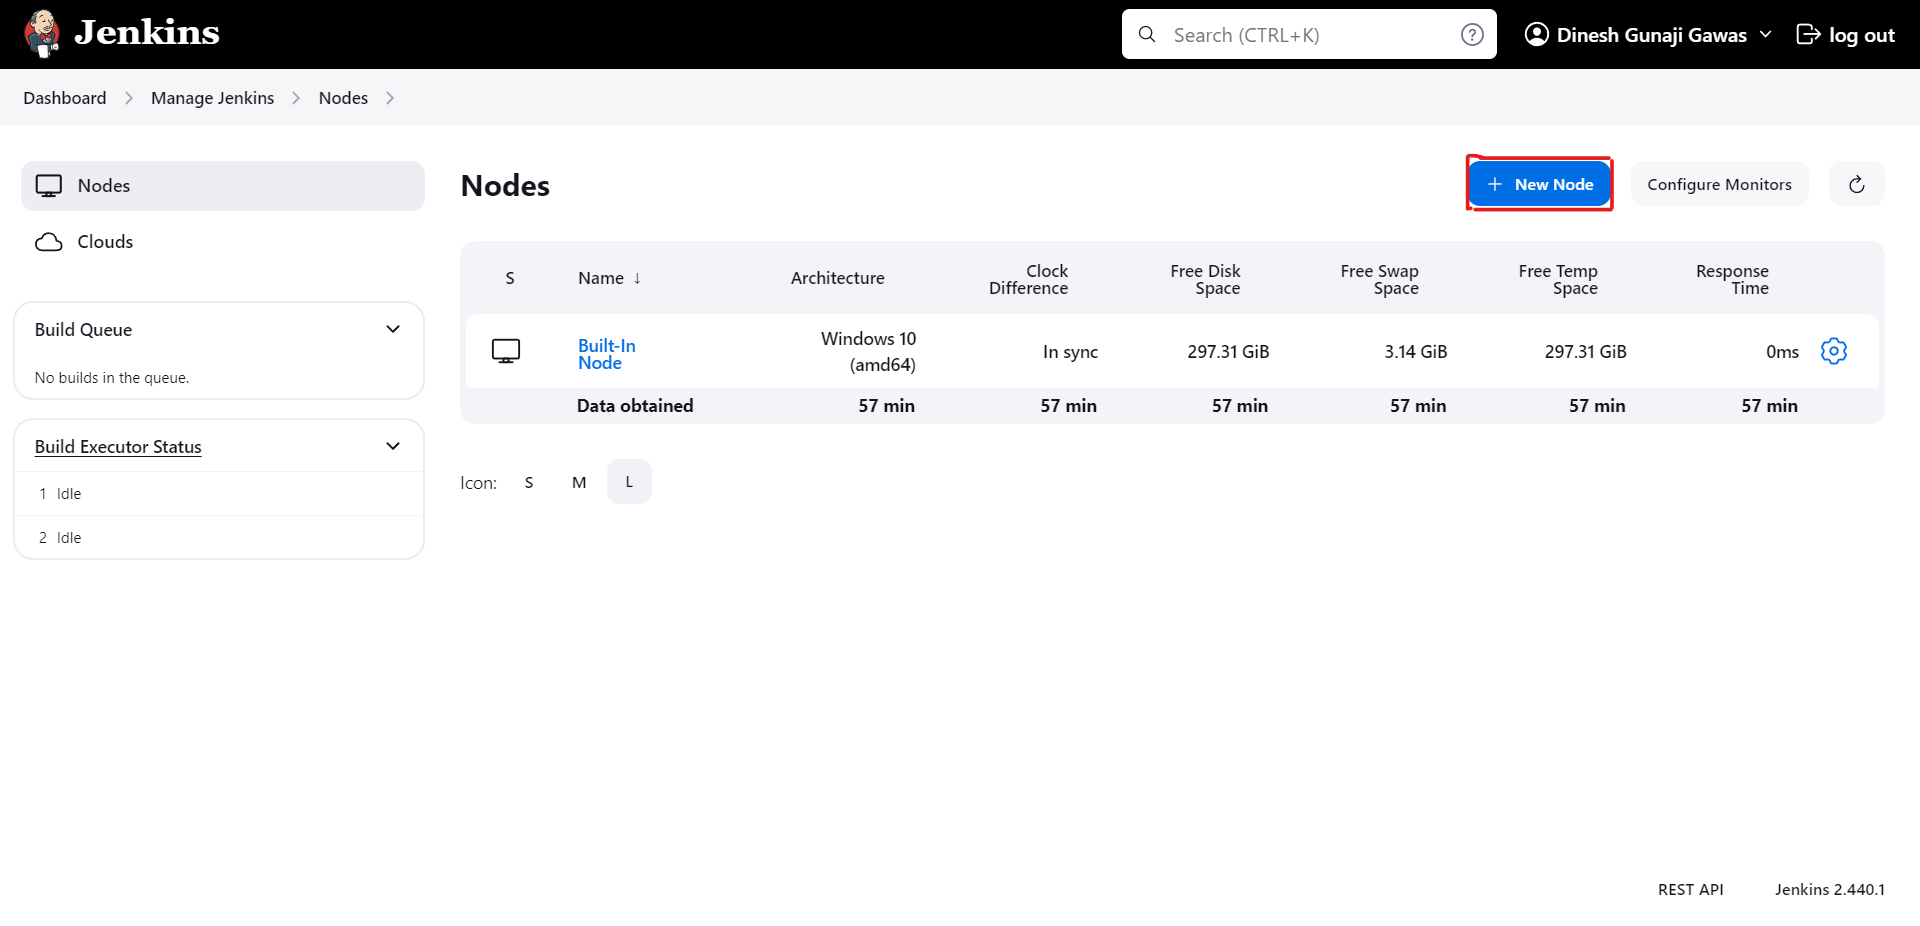
- Click on New Node button.
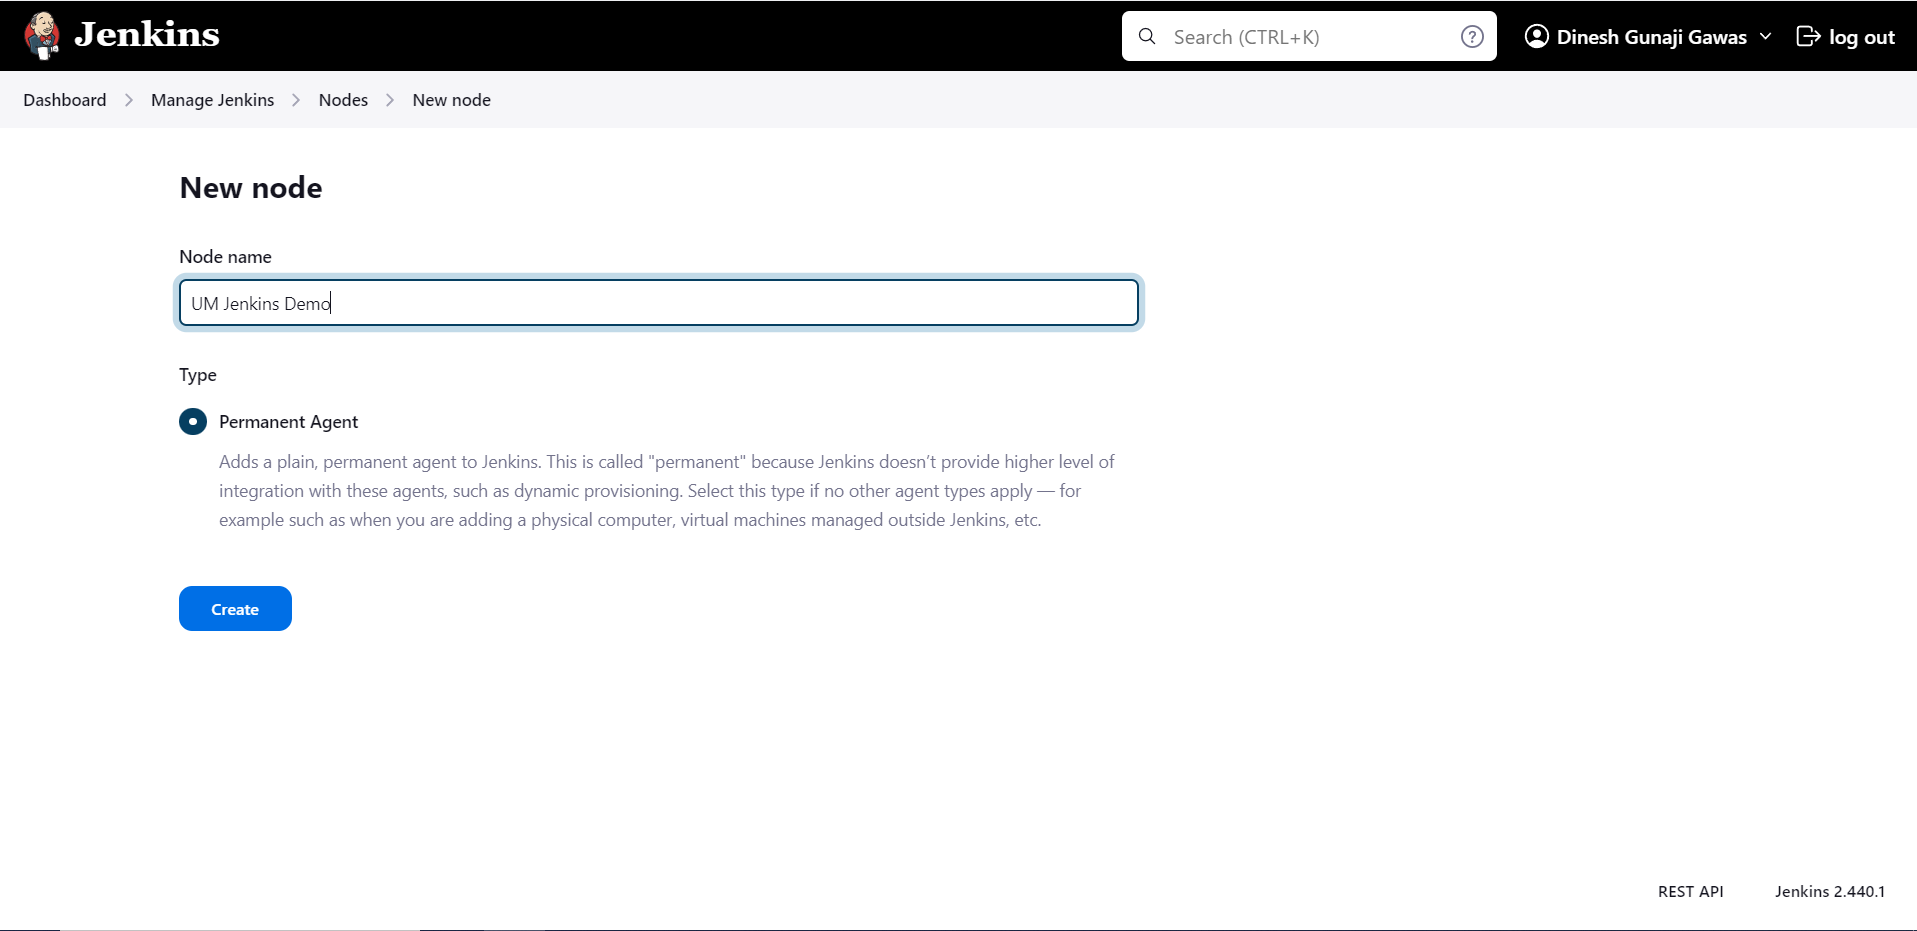
- Give your node a name and select Permanent Agent radio button and click on Create.
- Create an empty folder on your PC and copy its path and paste it in the Remote root directory.
- Give your node label of usemango.
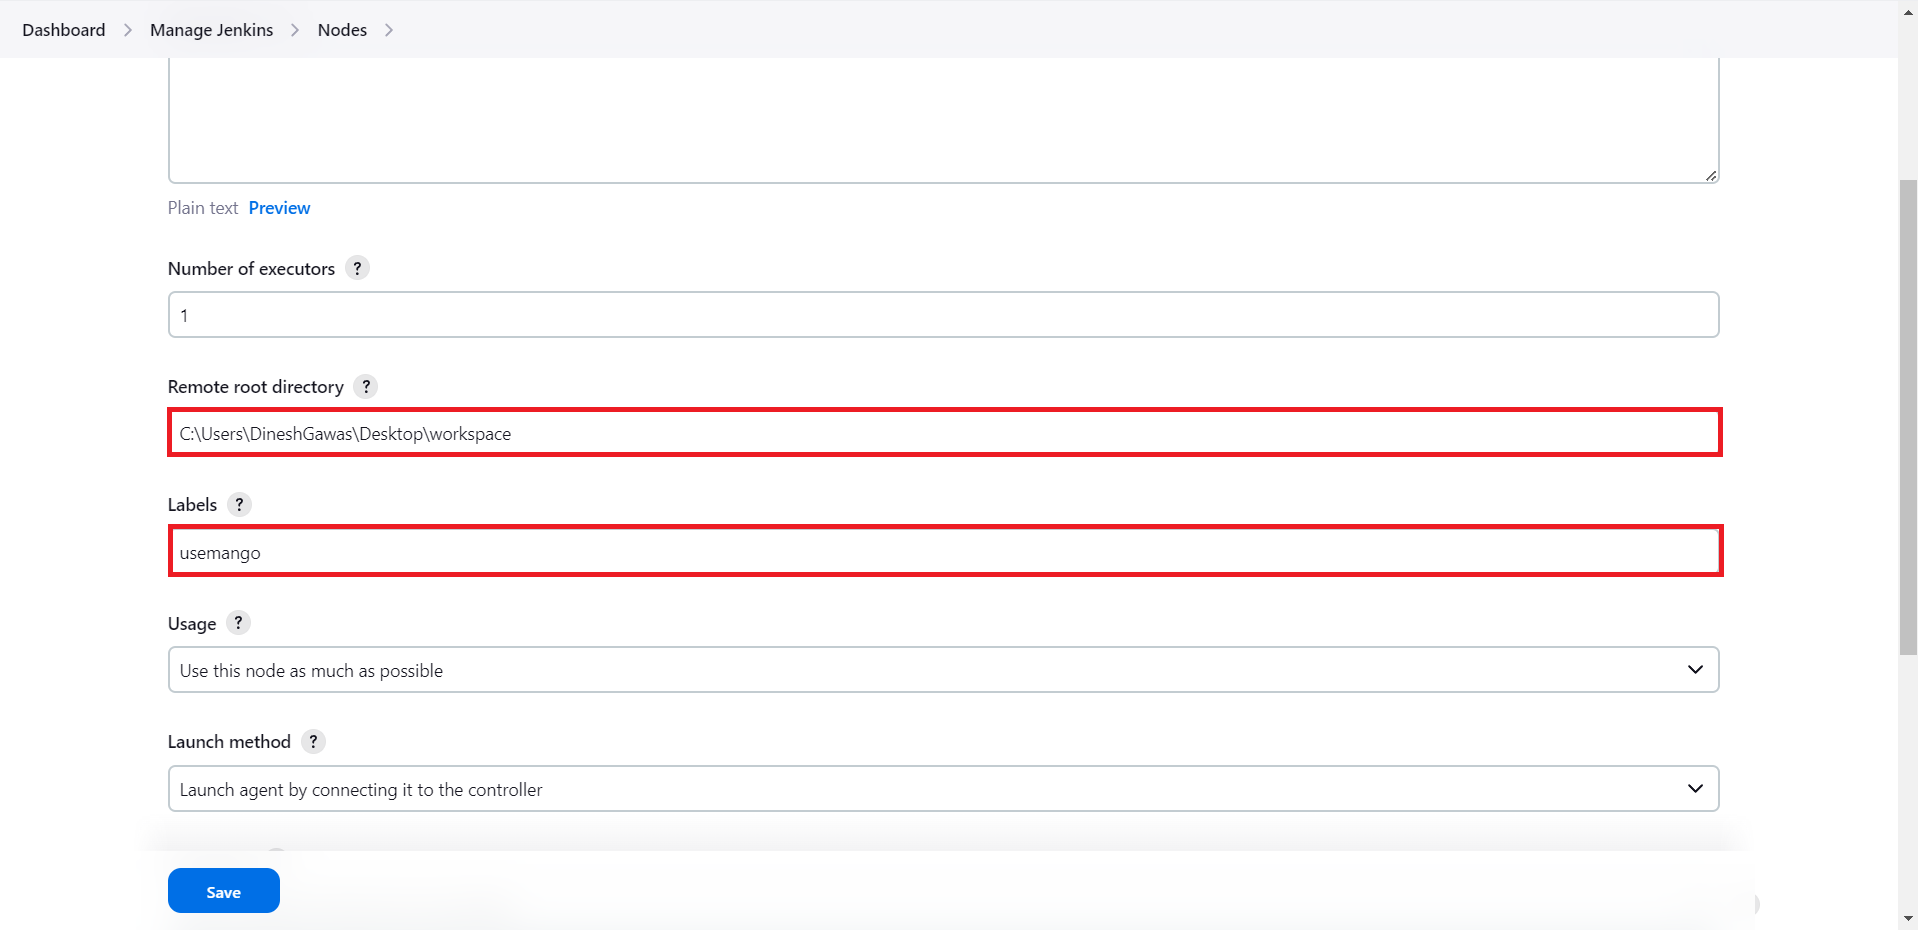
- Click on Save.
2. set TCP port for inbound agents
- Click on Manage Jenkins and then click on Security.
- Scroll down to TCP port for inbound agents.
- Select Random from the given options.
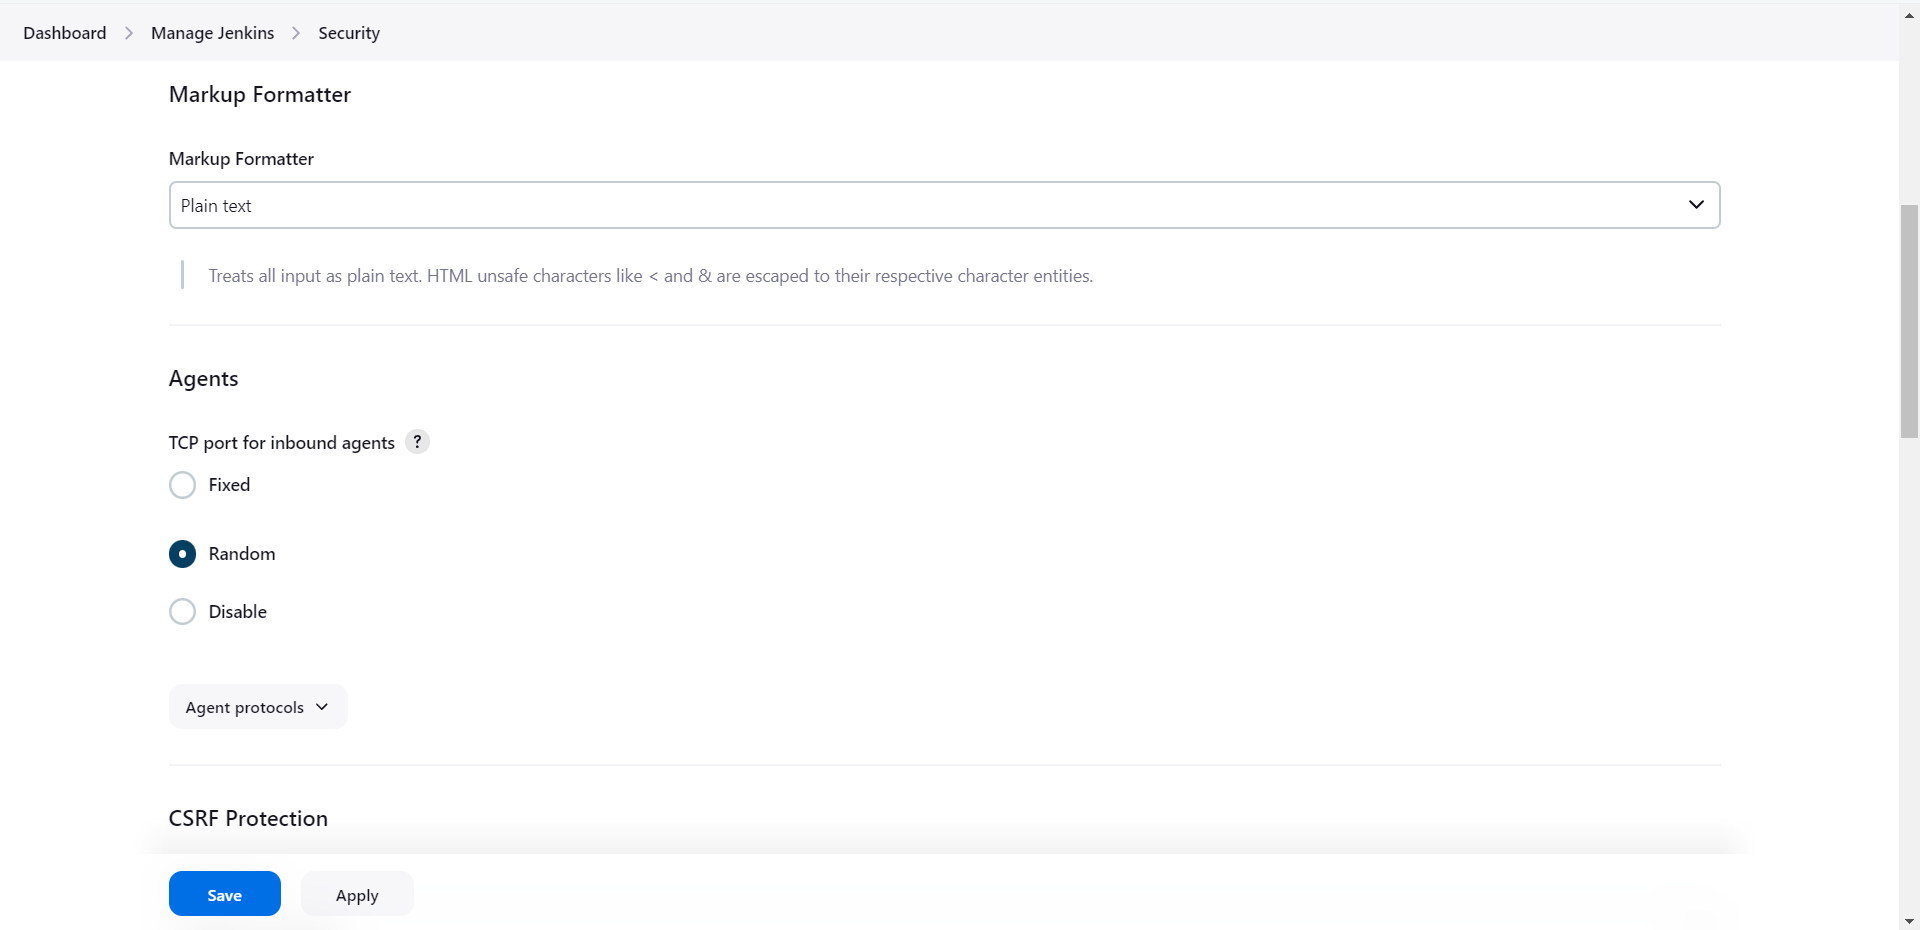
- Click Apply and then Save.
3. Establishing connection with the Node
- Click on Manage Jenkins and then click on Nodes.
- Click on the Node you just created in step 1.
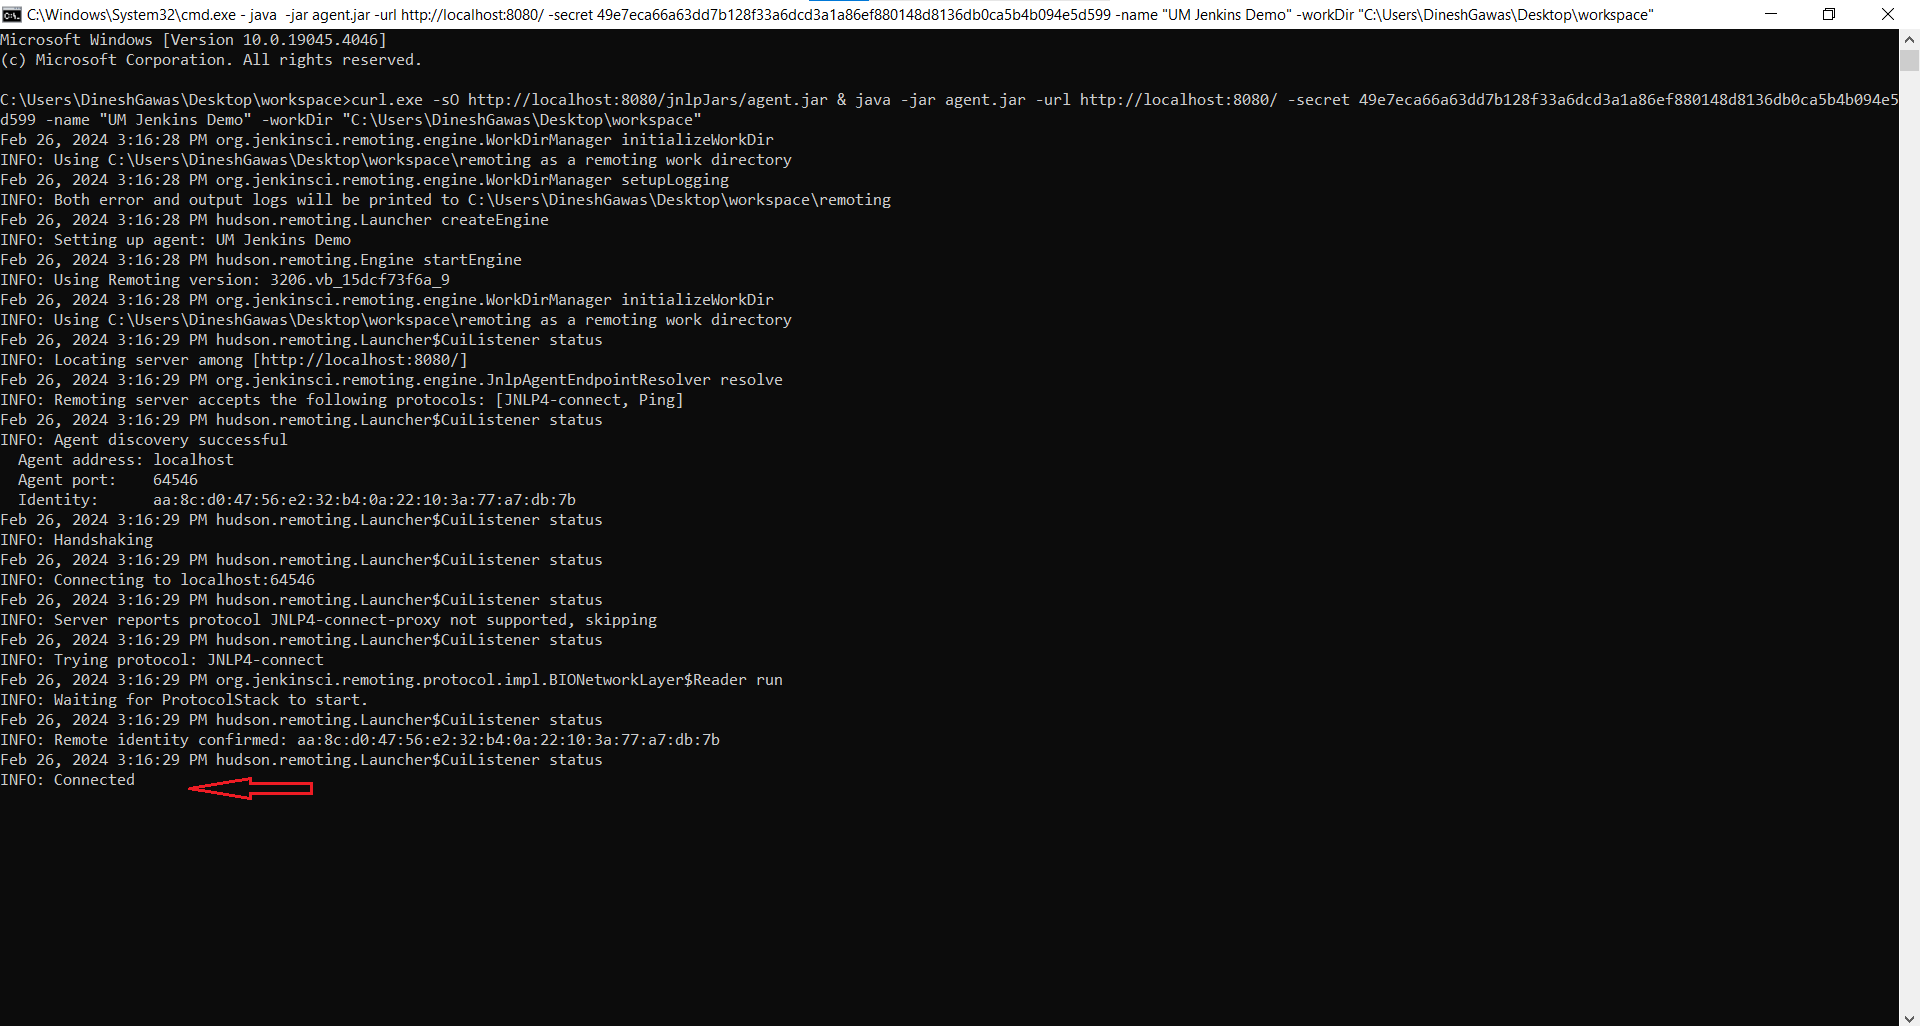
- Copy the command for windows node by clicking on the copy button.
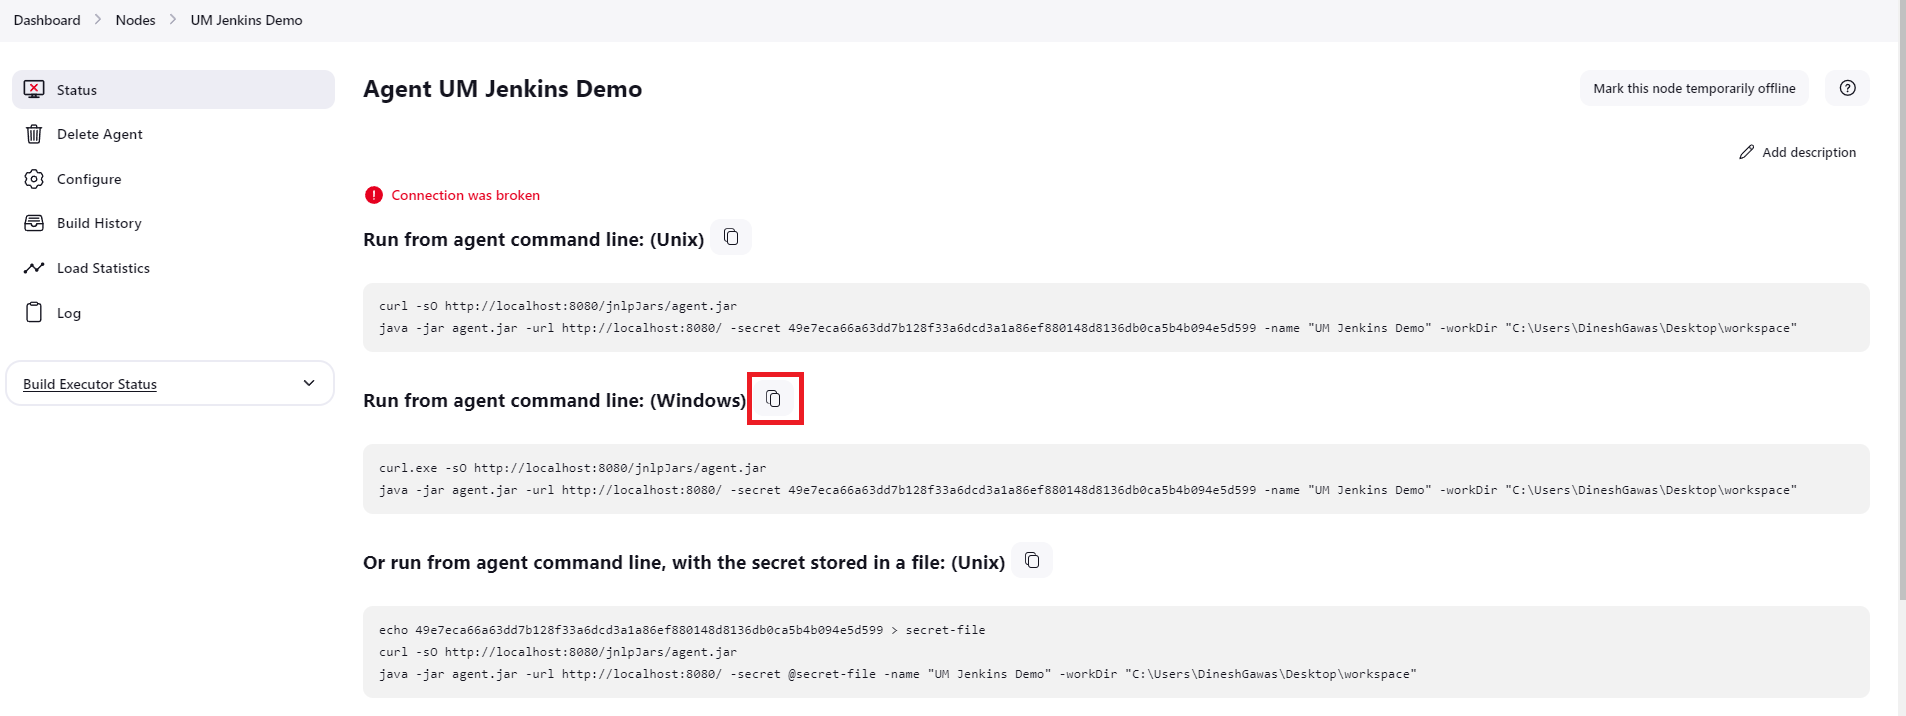
- Open Command prompt in the folder you created in step 1.5 and enter the command you just copied.
- Once you see Connected your agent is live.