Create a Ruby Component
If you are not familiar with the process of creating scripted components in useMango™, you can learn more about it here.
Create a new Ruby scripted component
-
Create a new scripted component in useMango™.
-
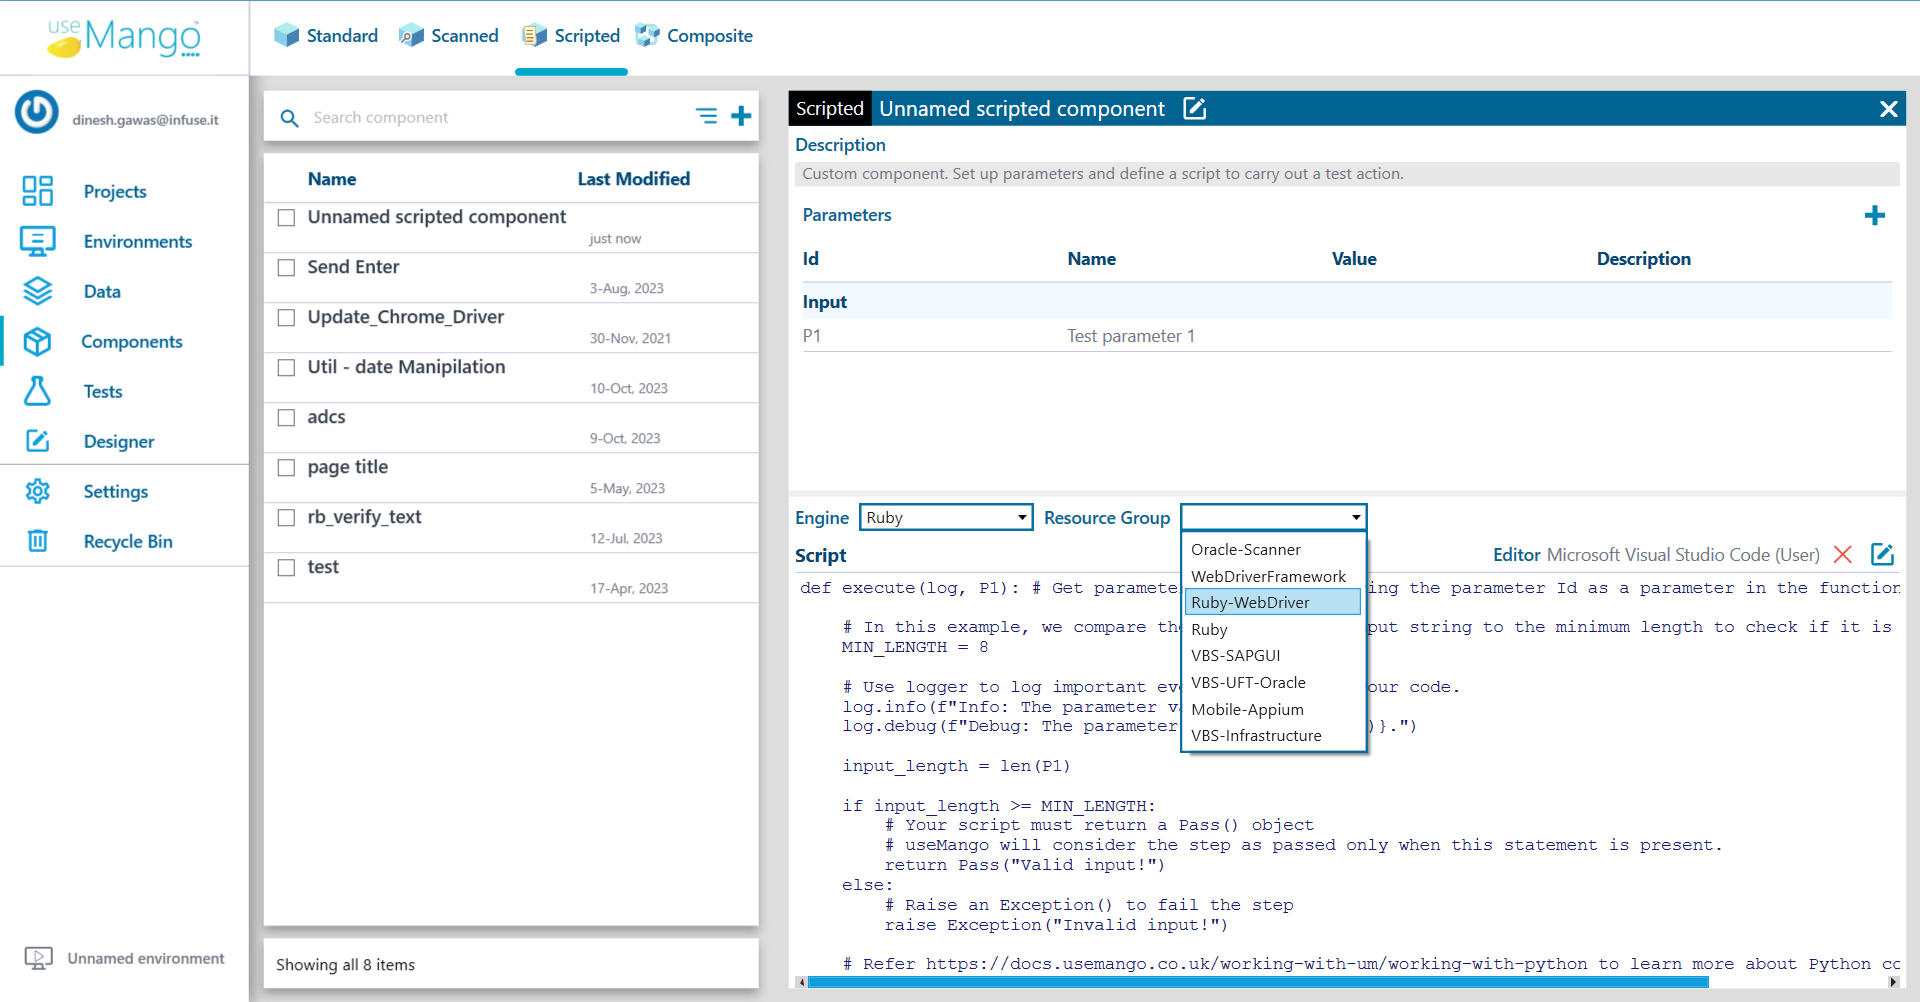
After successfully creating the component, select Ruby from the Engine dropdown.
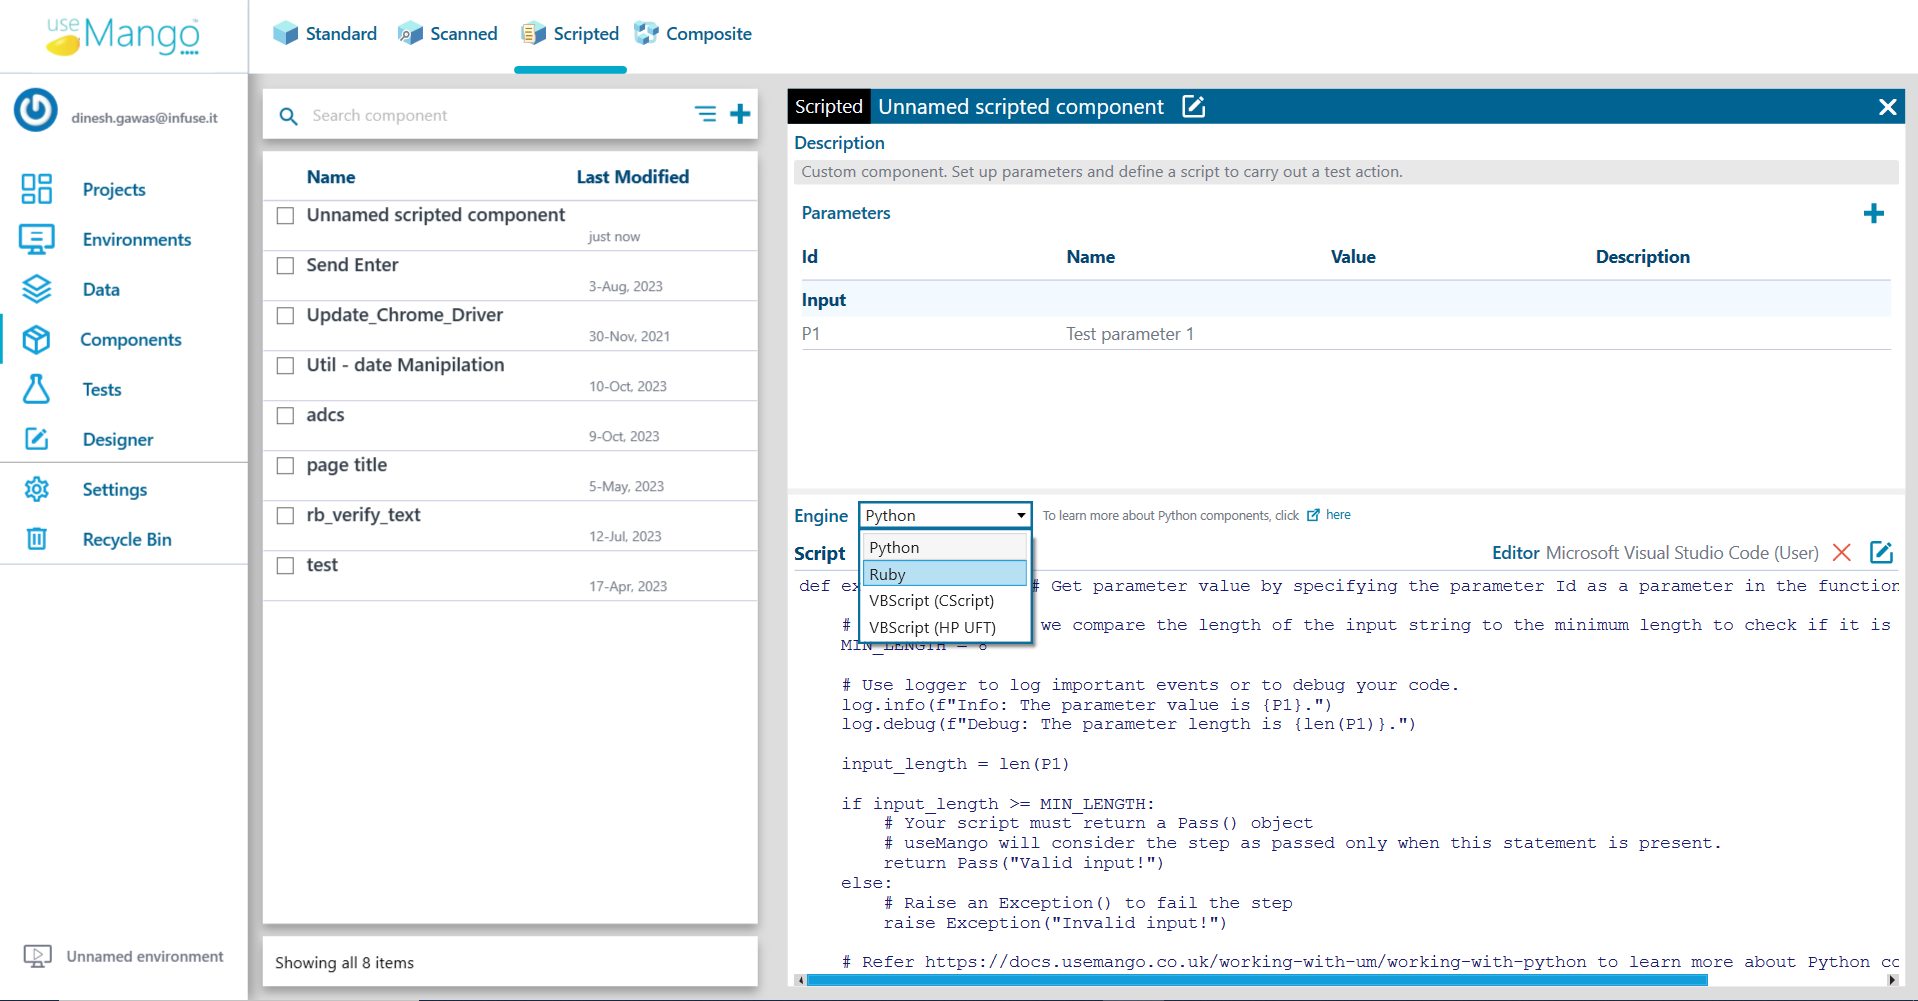
- Select Ruby-WebDriver from the Resource Group dropdown.
Let’s start by writing a Ruby script to Add 2 numbers:
-
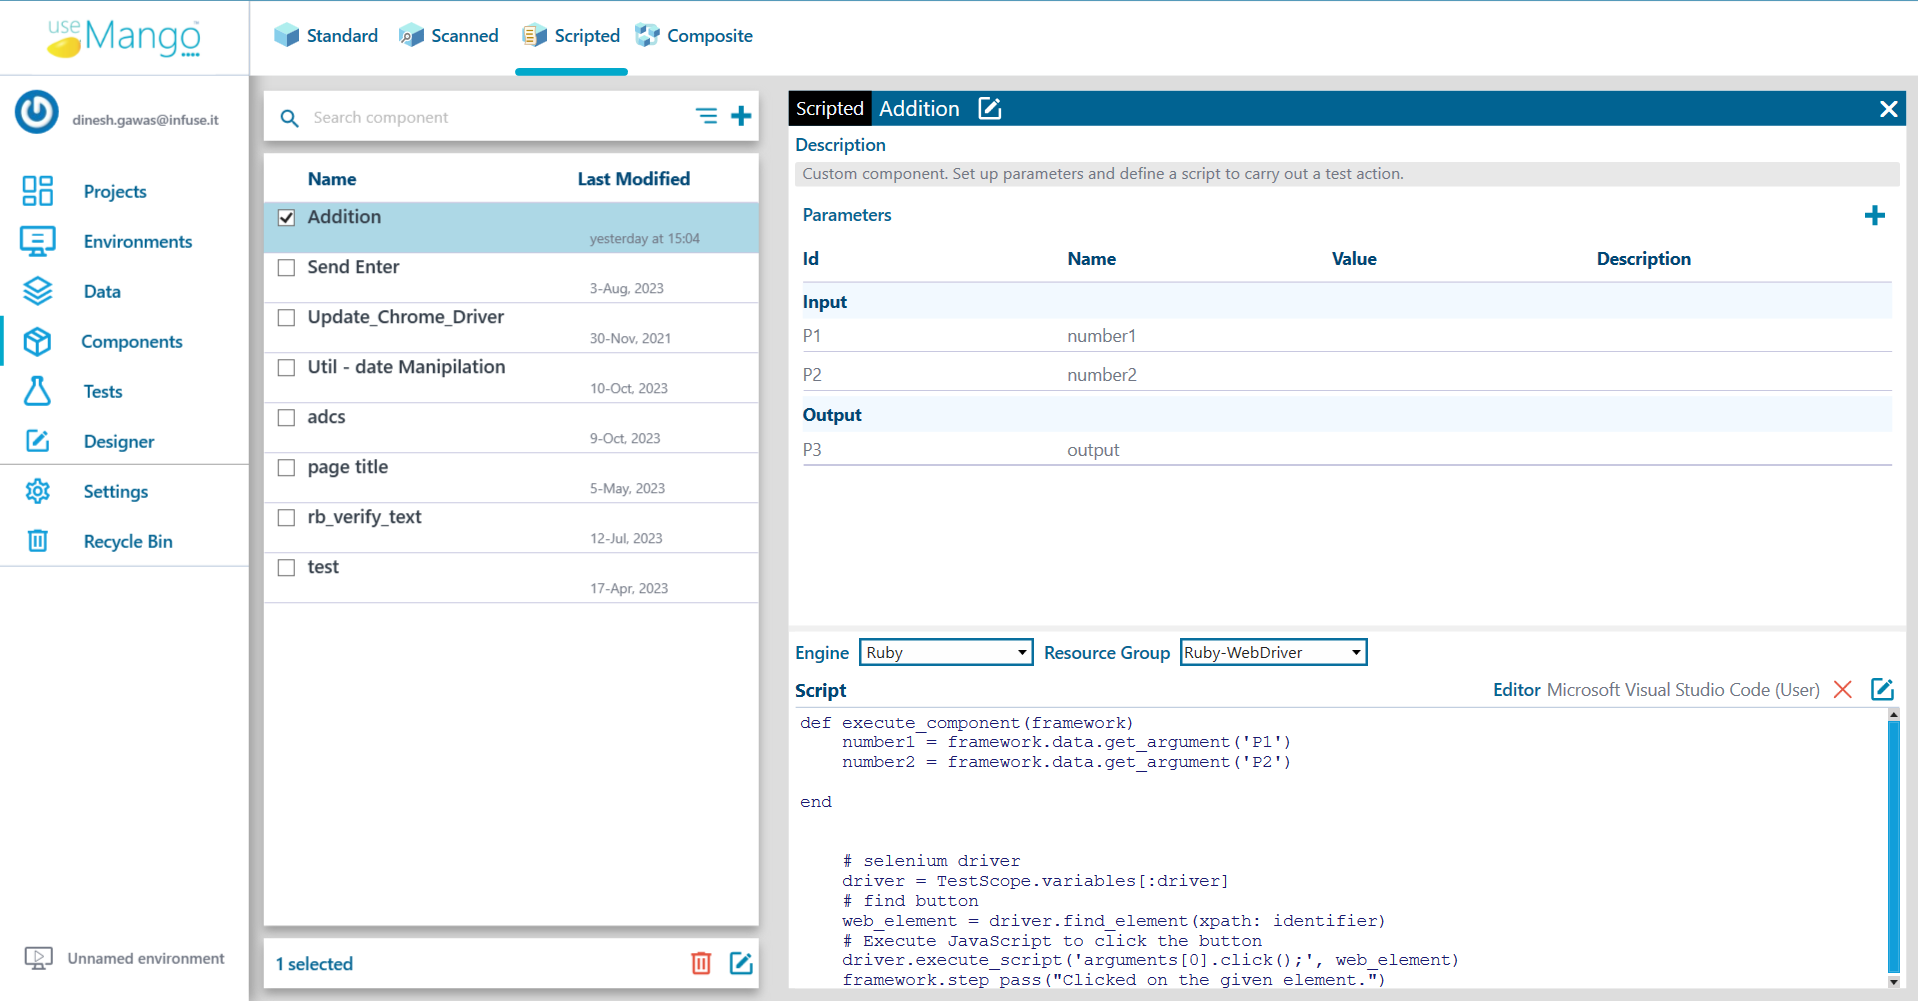
We will use the same component that we created previously. Change the component’s name to “Addition.”
-
Let’s include some parameters that will be passed to our newly created component.
If you are not familiar with the process of using parameters in scripted components in useMango™, you can learn more about it here.
- Create two Input parameters of type Text and name them number1 and number2, respectively. Add an Output parameter of type Text and name it output.
Here’s a sample code snippet that divides 2 numbers:
def execute_component(framework)
    begin
        number1 = framework.data.get_argument('P1')
        number2 = framework.data.get_argument('P2')

        <!-- Converting the string to integer -->
        number1 = number1.to_i
        number2 = number2.to_i

        output = number1 + number2

        framework.log.info("Output is: " + output)
        framework.data.set_output_parameter('P3', output)
        framework.step_pass("Step Passed")
    rescue => e
        raise (e.message)
    end
end
-
The name of the component function should be execute_component. We are passing a framework parameter that can be used to show information / debug the component.
-
To log information, we can use the info() method, for example,
framework.log.info ("This is informing") -
To debug, use the debug() method, for example,
framework.log.debug ("This is debugging")It also accepts a variable number of input arguments, which are identified by their parameter Ids, in this case P1 and P2.
-
To pass a component, we need to return a step_pass object whose constructor is of the form:
framework.step_pass(message) -
The message parameter, which specifies the success message, is of type string.
-
The outputs parameter, which specifies the component outputs, is a variable number of keyword arguments that can be specified in the format framework.data.set_output_parameter(‘ID’, value). In our case, the output is saved in a variable with the Id P3.
-
To indicate that a component has failed, we must raise an Exception object containing the failure message string.
- Copy the above sample code in the file component.rb and save the changes.
That’s it! You’ve created your first ruby component, which you can use in any of your tests!
Create a new Ruby scripted component for Web automation
Here’s a sample code snippet that clicks a button on the web page:
    def execute_component(framework)
        begin
            identifier = framework.data.get_argument('P1')

            driver = TestScope.variables[:driver]
            web_element = driver.find_element(xpath: identifier).click()
            framework.step_pass("Clicked on the given element.")
        rescue => e
            raise (e.message)
        end
    end
- To access the driver instance created by useMango, we can use TestScope.variables[:driver] method, for example,
driver = TestScope.variables[:driver]
That’s it! You’ve created your ruby component, which clicks on any given web element!