Adding Steps to a test
This topic describes how to add step to a test in useMango™.
useMango™ tests are constructed as an ordered sequence of test steps, and each test step uses a component to carry out a specific action when the test executes. When adding a new test step to a test, you need to select the step’s position and the associated component. To search and select a component refer to Component Selector that details instructions for the same.
Adding Steps to an Empty Test:
You have the option to directly choose a component from the suggestion list, which provides quick access to commonly used components. Alternatively, you can click on “Search for a component by name” to explore additional components using the Component Selector dialog.
![]()
Adding Steps to a Test with Existing Steps:
There are two ways to add a step to a test: using the Step Connector or the Test Map Toolbar. The instructions for both are provided below.
Using Step Connector:
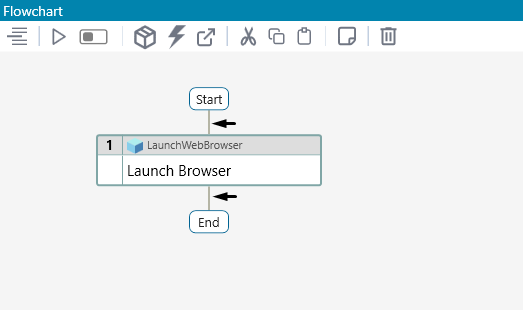
Each step in the tree view is connected using step connectors, These step connectors allow you to add steps in that position using context menu, follow the steps given below to add a step:
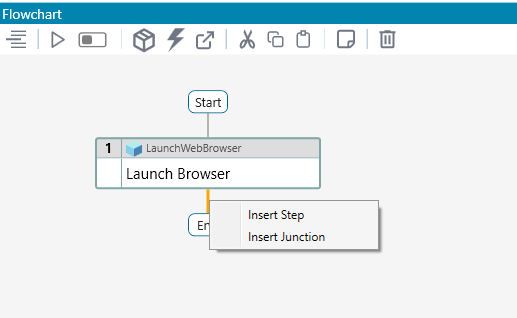
- Right click on the test step connector that appears in the test sequence where you wish to add your step.
- From the menu that appears on right click, select either Step or Junction based on your requirement.
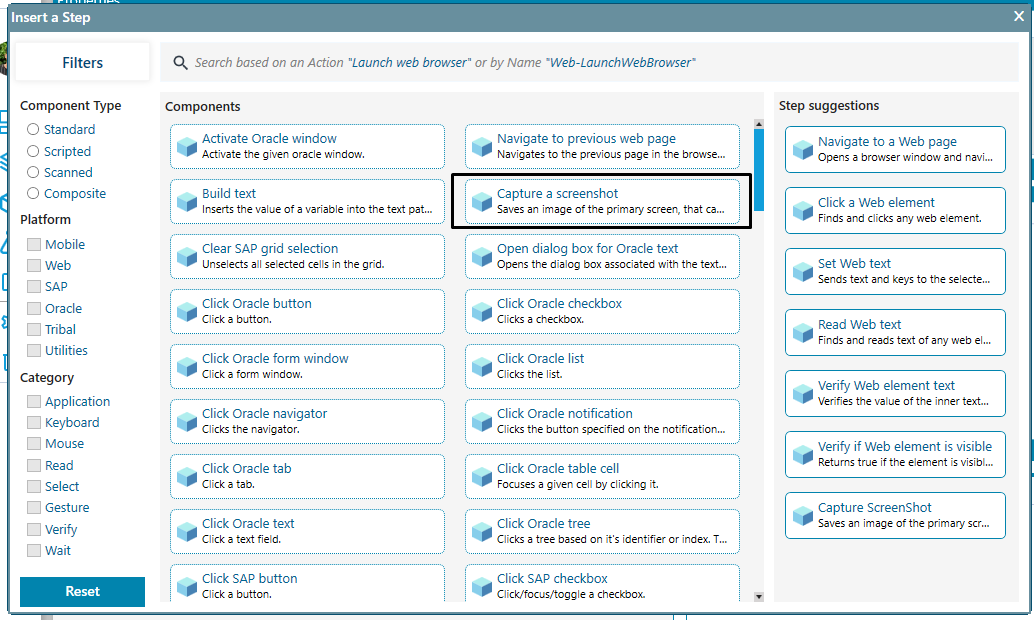
- Now, the Component Selector dialog will appear, allowing you to select the desired component.
- From the Component Selector, click on the component that you wish to add. (For demonstration, Capture a screenshot will be selected)
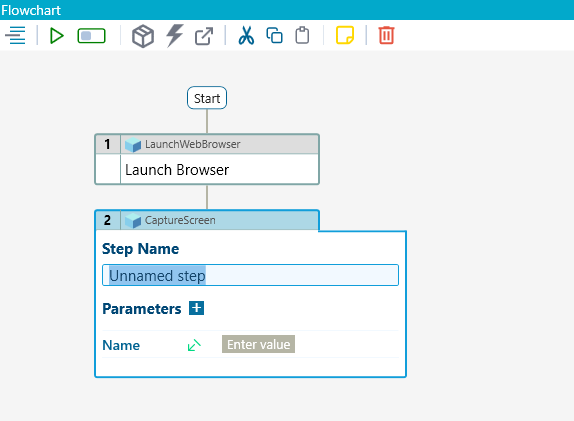
- The selected component then gets added to the test.
Using Test Map Toolbar:
The Test Map Toolbar allows users to interactively manage and modify their test. It provides a set of actions to add, arrange, and edit test steps within the test sequence. Follow the steps given below to add a step using the test map toolbar:
- Select the step next to which the new step should be positioned in the test sequence.
- Click on the “Insert Element” icon.

- From “Insert test element” popup, choose Step or Junction depending on your requirement from the “What to Insert?” option and then specify Above or Below from the “Where to Insert” option to place the new step accordingly.
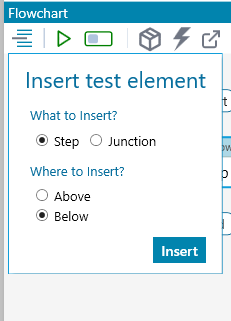
- Click on Insert.
- Now, the Component Selector dialog will appear, allowing you to select the desired component.
- Refer to steps 4 and 5 from the above section to add a step.