Using a Loop
Loops in useMango™ allows you to repeat specific test steps within a test. Whether you need to run steps a fixed number of times or iterate through a list of values, this feature simplifies repetitive tasks and ensures a seamless testing process. It enhances flexibility and reduces the effort required to automate scenarios that involve repeated actions.
Adding a Loop in a Test
In the useMango™ Test Designer
- Add a new loop by selecting the Insert an element option from the toolbar, or by right-clicking on the connector line and select Insert loop below the existing step in your test flow.
Fig: Adding a loop
Once added, the steps inside the loop will repeat and execute according to the specified loop count or loop table.
Nesting of loops is supported using a composite component. While you cannot directly add a loop inside another loop in the test designer, you can achieve this by placing a loop within a composite component and including it in your main loop.
Configure the Loop
After adding a loop, double-click on it or hover over the loop and click on the spanner icon to configure its behavior. You will be prompted to choose one of the following options:
- Loop Count : Choose this if you want the loop to run a specific number of times.
- Loop Table : Choose this if you have a table and want the loop to go through each row one at a time in each iteration.
Fig: Loop configure options
The usage of each option will depend on the specific use case of the test being performed.
Adding steps within a loop
To add steps within the loop either right-click on the connector line under the loop and select Insert Step, or select the loop and use the Insert an element option from the toolbar and select Within.
Loop Count
Loop Count is used when you need to repeat the same action a specific number of times. This option is helpful for tests where the number of repetitions is fixed and doesn’t depend on external data. It’s a simple and effective way to perform repetitive tasks, such as verifying consistent behavior or testing scenarios multiple times to ensure reliability.
How to set Loop Count
- Select Loop Count radio button.
- Assign a number directly to the loop count field, or use a text-type variable with a numeric value assigned to it.
Fig: Selecting Loop Count
The loop count number should be greater than or equal to zero. Setting the count to zero means the loop will not execute.
Loop Table
The Loop Table lets you repeat steps in a test using different data from each row of a table provided to it. In each iteration, the loop picks a row of data corresponding to the loop iteration index, allowing you to perform the same actions with different values each time.
Creating and using a table variable with loop table
In order to use a loop table, you will need to create a Table type data, which can be a test variable, project variable, environment variable or test parameter. For instructions on editing table data, refer to the Data Types in useMango™ page.
Assigning a table to the loop table
- Double-click on the loop or hover over the loop and click on the spanner icon to open the configuration options.
- Select Loop Table radio button.
- Drag and drop the table variable onto the loop table or click on the Loop Table value field and begin typing the name of the table variable.
Fig: Assigning a table to the loop table
Understanding and using table headers
Table headers are the first row in a table that defines the labels for each column. They act as identifiers for the data in that column. For example, if a table is used to store information employee data, the headers could be First Name, Last Name, Age, Email, etc with the rows underneath containing the corresponding data for each person.
Fig: Table view Fig: Viewing table headers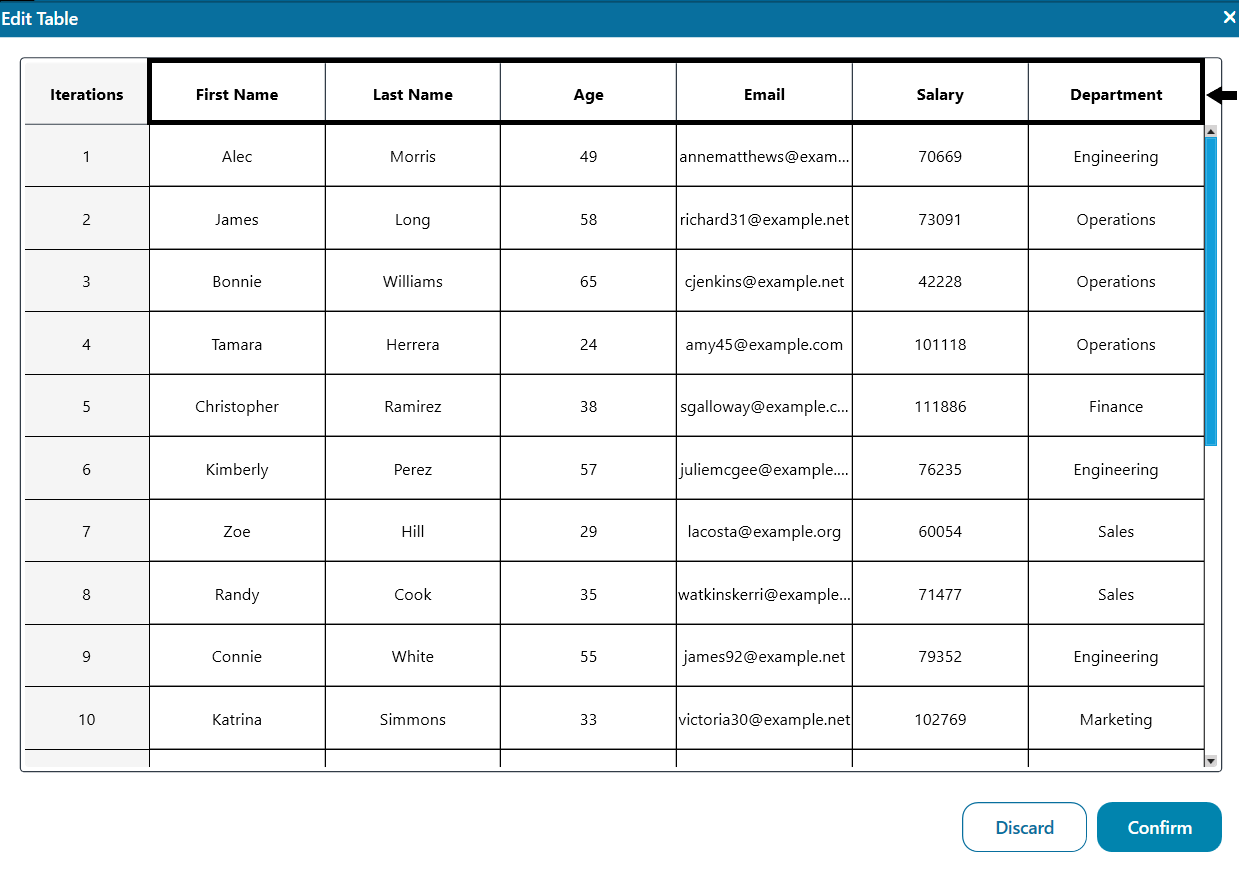
Assigning table headers to steps in a loop
Assigning table headers to steps ensures that each step receives a value from the row corresponding to the current iteration.
-
To assign table headers, ensure that a table is assigned to the loop first.
-
Click on the > icon next to the table data to view the table headers.
-
There are two ways to assign table headers:
a. Drag and drop the table headers into the steps inside the loop.
b. Type the header name into the step value field and select it from the dropdown.
Fig: Assigning table headers to steps in a loop
Some Important Notes
- Switching from loop table to loop count will prompt a warning and delete any headers assigned to steps inside the loop.
Fig: Switching from loop table to loop count
- Loop execution is only supported in V2 engine.
- Steps within a loop cannot be executed independently by the test designer when table headers are assigned to a step’s parameter.